
Build Your First Workflow
By the end of this tutorial you’ll have a real working API — a webhook URL that takes a city name and returns the current weather. It uses three steps, no auth, no external accounts, and you’ll be able to call it with curl from your terminal.
This is a hands-on tutorial. If you want the conceptual overview first — what a step is, what a trigger is, how templates work — start with Core Concepts and come back here.
What you’ll build:
curl -X POST https://run.quickflo.app/w/@your-org/weather-lookup \  -H "Content-Type: application/json" \  -d '{"city": "Austin"}'
# Response:# {#   "city": "Austin",#   "country": "United States",#   "temperatureF": 72.3,#   "windMph": 8.4,#   "weatherCode": 0# }
What you’ll learn along the way:
- How to add and configure steps
- How step outputs feed into later steps via template syntax
- How to chain HTTP requests
- How to shape a webhook response with the return step
- How QuickFlo flips automatically from async to sync execution when you add a return step
Time: ~10 minutes. Prerequisites: a QuickFlo workspace. That’s it.
Step 1 — Create a new workflow
Section titled “Step 1 — Create a new workflow”-
From the Workflows page, click New Workflow.
-
Name it
Weather Lookup API(or whatever you want — the name shows up in the URL). -
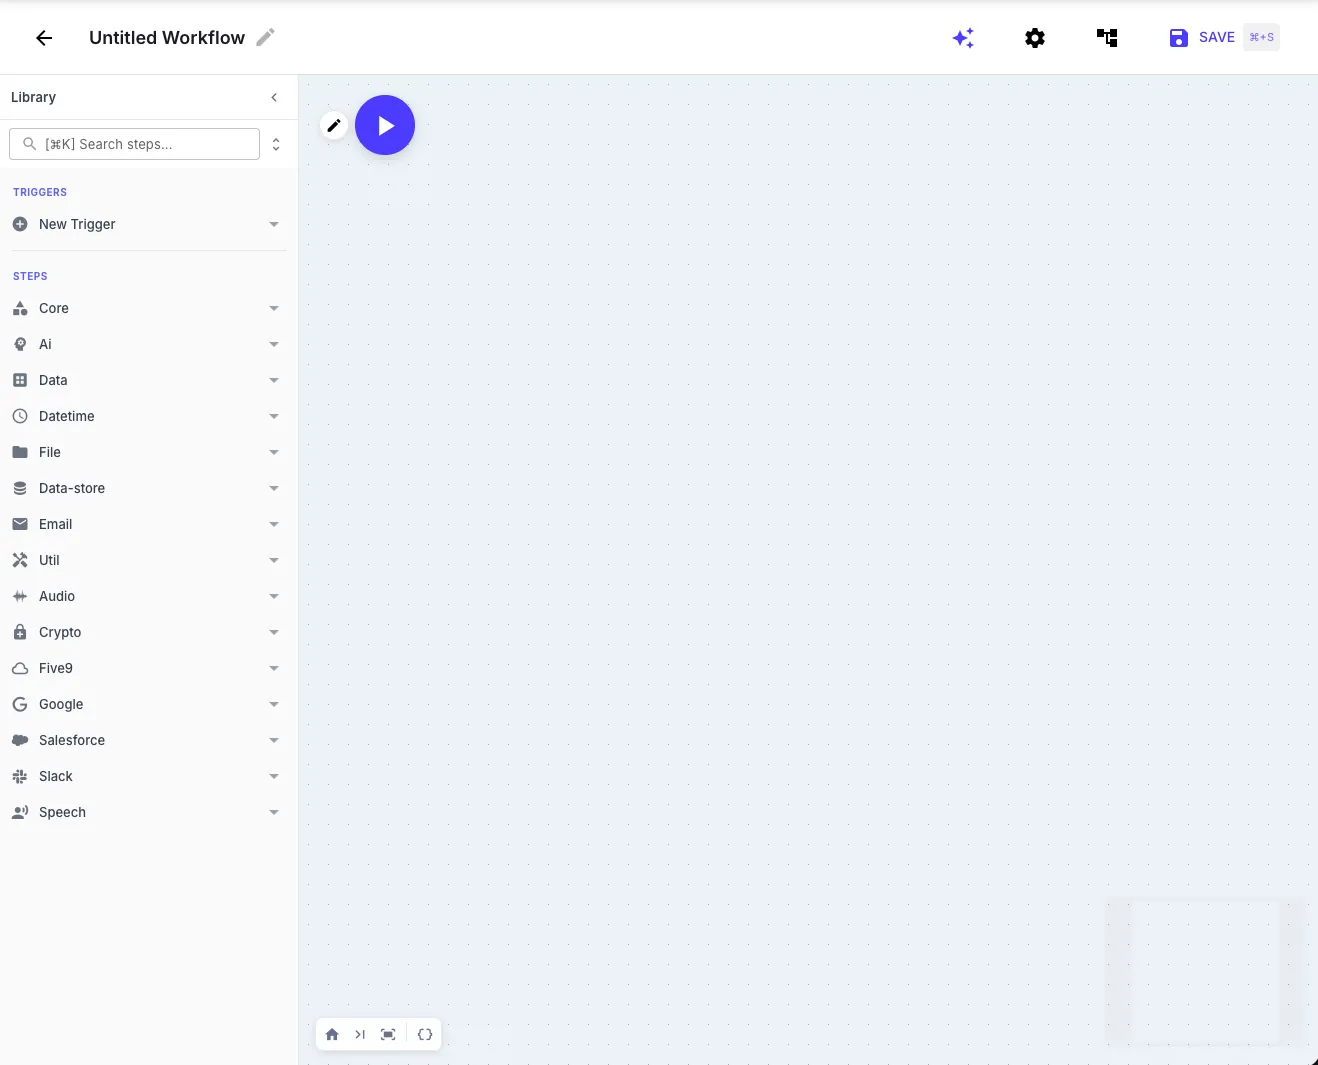
You’ll land in the workflow builder — an empty canvas on the left and a step library panel on the right.
Step 2 — Add a webhook trigger
Section titled “Step 2 — Add a webhook trigger”A trigger tells QuickFlo when to run your workflow. We’ll use a webhook so we can call it from curl (or any HTTP client).
-
In the Library sidebar, find Triggers → Webhook and drag it onto the canvas.
-
Click the trigger to open its config panel. Set:
- Name:
weather-lookup - Method:
POST - Leave Authentication off for now — we’ll add it later.
- Name:
-
Save the workflow. The trigger panel now shows the Webhook URL — copy it to the clipboard, you’ll need it in step 6.
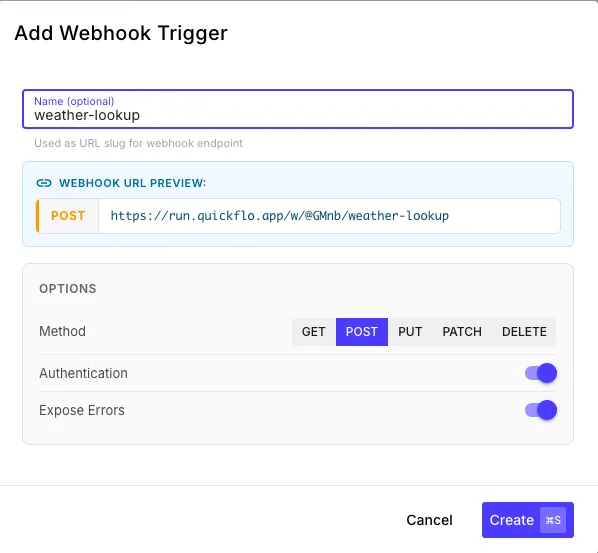
When this webhook fires, the request body becomes available inside the workflow as {{ initial.* }} — so a POST body of {"city": "Austin"} becomes {{ initial.city }} (which evaluates to "Austin").
Step 3 — Add an HTTP step to look up the city’s coordinates
Section titled “Step 3 — Add an HTTP step to look up the city’s coordinates”The weather API we’ll use needs latitude and longitude, not a city name. So we’ll geocode the city first using open-meteo’s free geocoding API.
-
From the step library, drag HTTP onto the canvas (it’s under Core). Click it to configure.
-
Set:
-
Step ID:
geocode -
Method:
GET -
URL:
https://geocoding-api.open-meteo.com/v1/search -
In the Params tab, add two key-value pairs:
Key Value name{{ initial.city }}count1
That
{{ initial.city }}value is a Liquid template — at execution time, QuickFlo replaces it with whatever the webhook caller sent in thecityfield of the request body. Keeping query parameters in the Params tab (rather than concatenated into the URL) is the cleaner pattern — QuickFlo handles encoding for you and the values stay readable in the editor. -
-
Click Test Run with sample data
{"city": "Austin"}. You should see a response that looks like:{"results": [{"name": "Austin","latitude": 30.26715,"longitude": -97.74306,"country": "United States",...}]}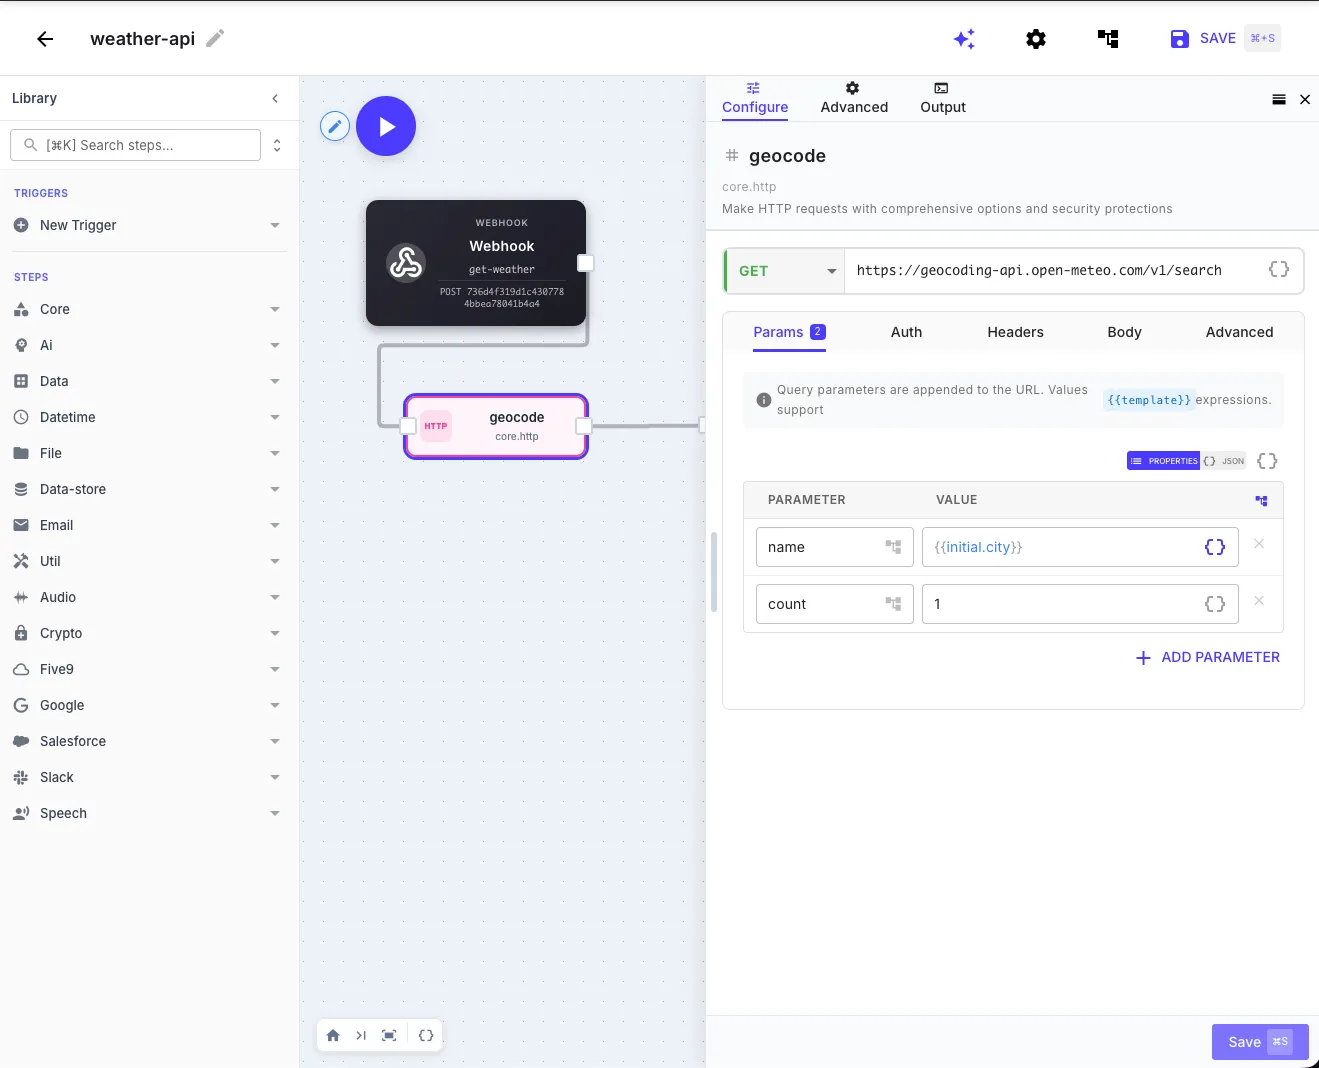
This is the moment to internalize the QuickFlo data model: every step’s output is now available to later steps as {{ <stepId>.<field> }}. So everywhere later in the workflow, the latitude is {{ geocode.body.results[0].latitude }} and the longitude is {{ geocode.body.results[0].longitude }}.
Step 4 — Add a second HTTP step to fetch the forecast
Section titled “Step 4 — Add a second HTTP step to fetch the forecast”Now that we have coordinates, we can call the weather forecast endpoint.
-
Drag another HTTP step onto the canvas. Click to configure.
-
Set:
-
Step ID:
forecast -
Method:
GET -
URL:
https://api.open-meteo.com/v1/forecast -
In the Params tab, add:
Key Value latitude{{ geocode.body.results[0].latitude }}longitude{{ geocode.body.results[0].longitude }}currenttemperature_2m,wind_speed_10m,weather_codetemperature_unitfahrenheitwind_speed_unitmph
Notice how the
latitudeandlongitudevalues reference the previous step’s output via{{ geocode.body.results[0].latitude }}. When you start typing{{in the value field, the template autocomplete dropdown should suggest fields fromgeocodeautomatically. -
-
Test run again. You should see the current weather:
{"current": {"temperature_2m": 72.3,"wind_speed_10m": 8.4,"weather_code": 0,...}}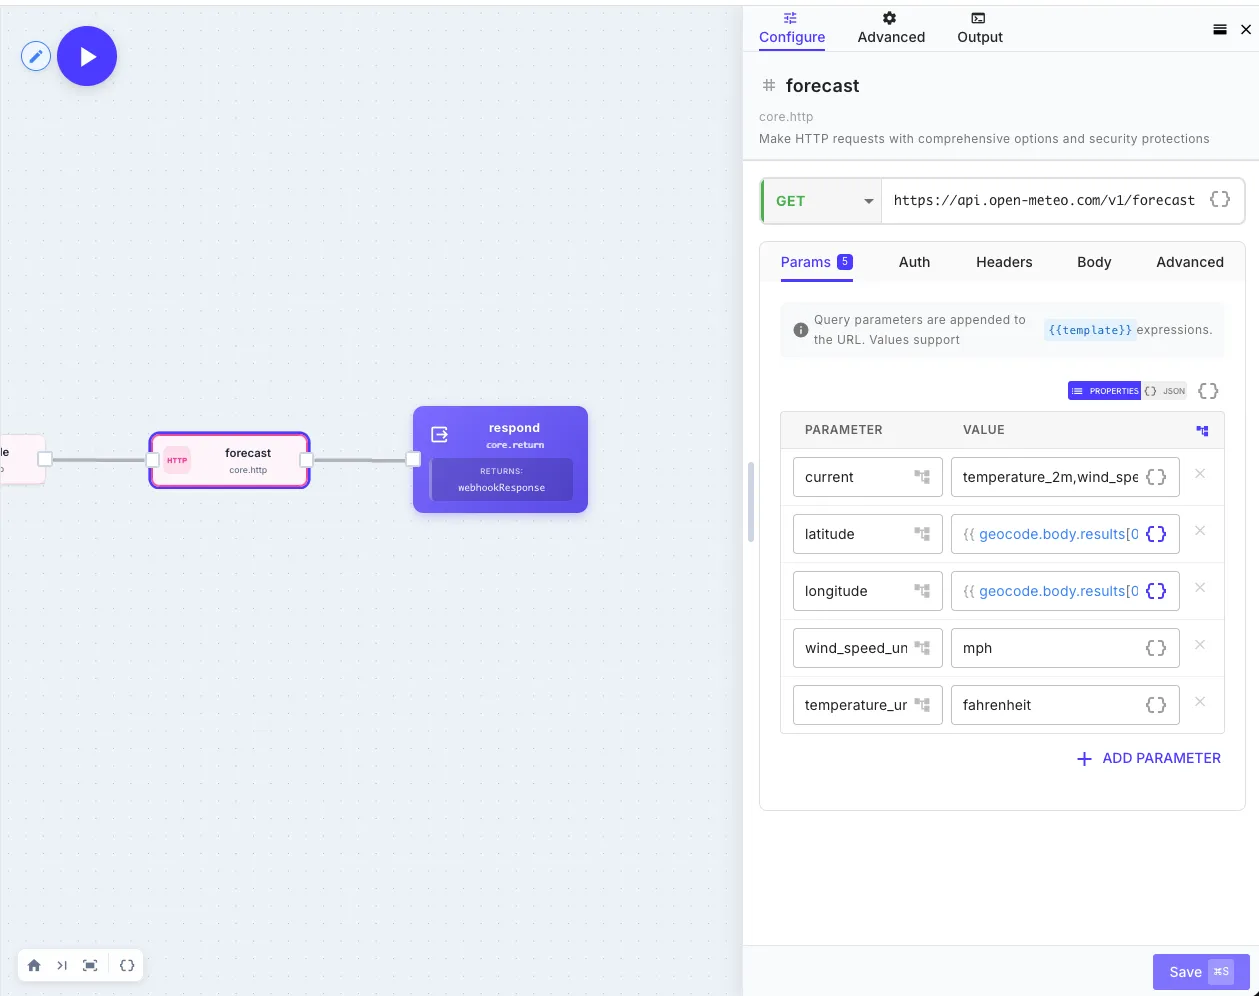
You’ve just chained two HTTP requests where the second one depends on data from the first. That’s the core of how every QuickFlo workflow works — each step is a node in a data graph.
Step 5 — Add a Return step to shape the response
Section titled “Step 5 — Add a Return step to shape the response”Right now your workflow runs but doesn’t return anything to the caller. By default a webhook-triggered workflow runs asynchronously and the caller gets back 202 Accepted with an execution ID. Adding a Return step flips it to synchronous mode, and the caller gets exactly what we put in the response body.
-
Drag a Return step onto the canvas. Click to configure.
-
The Return step’s editor adapts to your trigger type. Since this workflow has a webhook trigger, you’ll see a Webhook Response tab. Set:
- Status Code:
200 - Body (JSON):
{"city": "{{ initial.city }}","country": "{{ geocode.body.results[0].country }}","temperatureF": "{{ forecast.body.current.temperature_2m }}","windMph": "{{ forecast.body.current.wind_speed_10m }}","weatherCode": "{{ forecast.body.current.weather_code }}"} - Status Code:
-
Save the workflow.
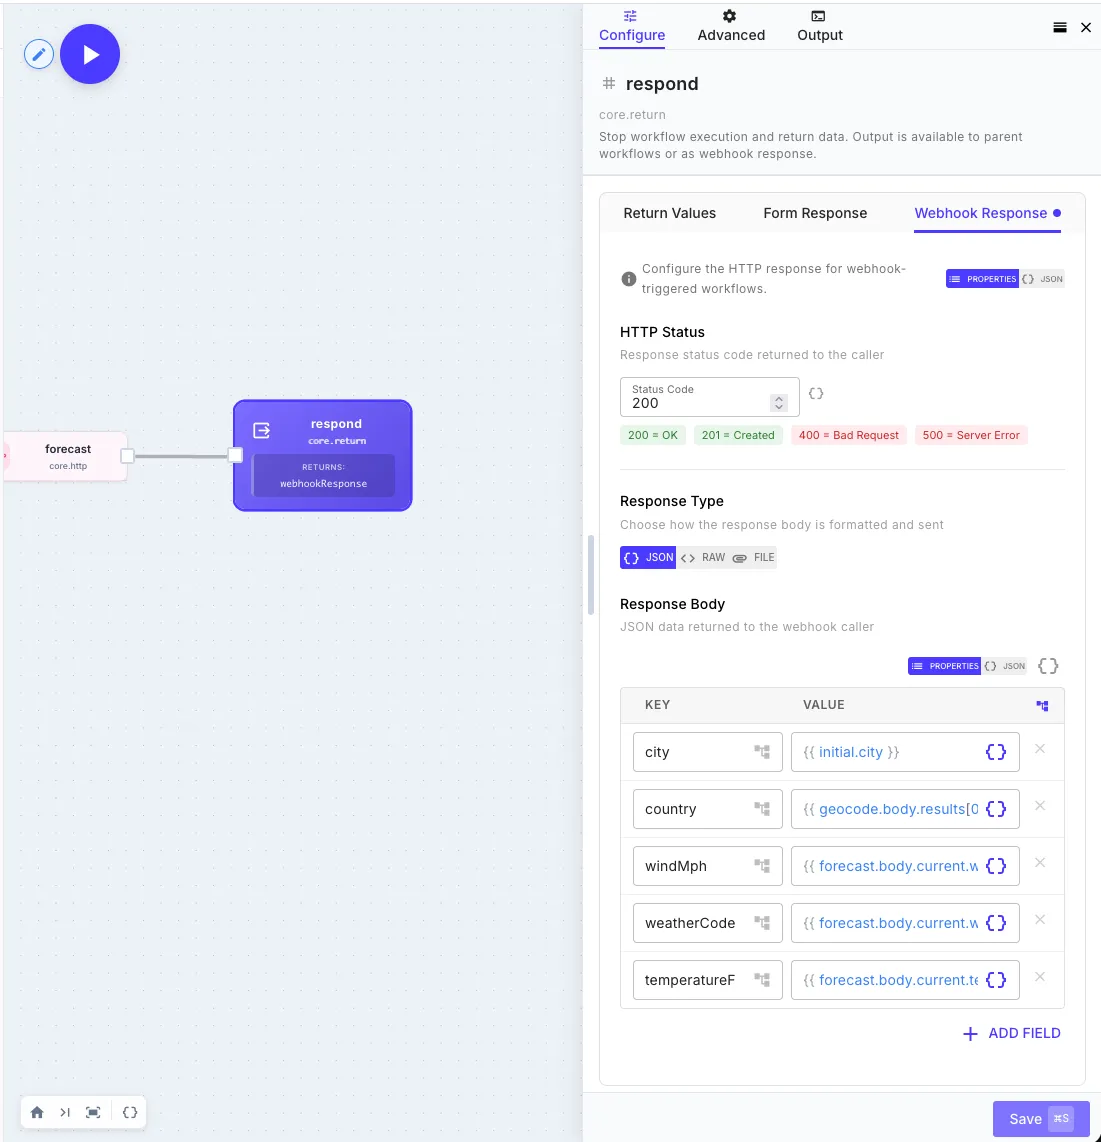
That’s the entire workflow — three steps. Webhook trigger fires → geocode → forecast → return shaped JSON. Done.
Step 6 — Test it
Section titled “Step 6 — Test it”Open your terminal and call the webhook URL you copied in step 2:
curl -X POST https://run.quickflo.app/w/@your-org/weather-lookup \ -H "Content-Type: application/json" \ -d '{"city": "Austin"}'You should get back:
{ "city": "Austin", "country": "United States", "temperatureF": 72.3, "windMph": 8.4, "weatherCode": 0}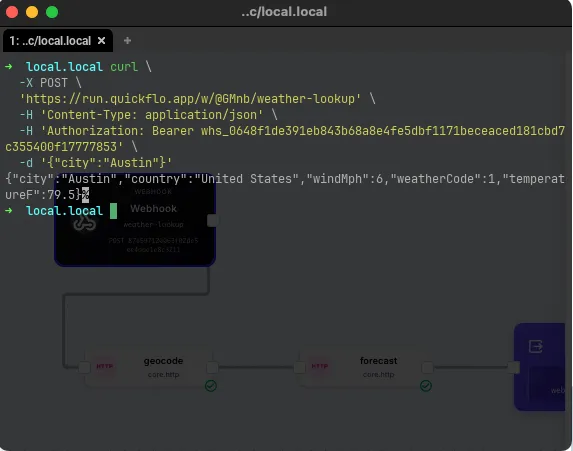
That’s a real, public, callable HTTPS API — built in 10 minutes, no server, no deployment, no infrastructure. You can call it from your phone, paste it into Postman, hand the URL to a teammate, or use it as the backend for a frontend you’re building.
Try it with other cities:
curl -X POST https://run.quickflo.app/w/@your-org/weather-lookup \  -d '{"city": "Tokyo"}'
curl -X POST https://run.quickflo.app/w/@your-org/weather-lookup \ -d '{"city": "Reykjavik"}'Shortcut — paste the finished workflow
Section titled “Shortcut — paste the finished workflow”If you want to skip ahead and play with the result, copy the JSON below to your clipboard, then in the workflow builder press Cmd+V (Mac) or Ctrl+V (Windows) on the canvas. The three steps will appear, fully configured.
{ "name": "Weather Lookup API", "initial": { "city": "Austin" }, "steps": [ { "stepId": "geocode", "stepType": "core.http", "input": { "url": "https://geocoding-api.open-meteo.com/v1/search", "method": "GET", "searchParams": { "name": "{{ initial.city }}", "count": "1" } } }, { "stepId": "forecast", "stepType": "core.http", "input": { "url": "https://api.open-meteo.com/v1/forecast", "method": "GET", "searchParams": { "latitude": "{{ geocode.body.results[0].latitude }}", "longitude": "{{ geocode.body.results[0].longitude }}", "current": "temperature_2m,wind_speed_10m,weather_code", "temperature_unit": "fahrenheit", "wind_speed_unit": "mph" } } }, { "stepId": "respond", "stepType": "core.return", "input": { "webhookResponse": { "statusCode": 200, "body": { "city": "{{ initial.city }}", "country": "{{ geocode.body.results[0].country }}", "temperatureF": "{{ forecast.body.current.temperature_2m }}", "windMph": "{{ forecast.body.current.wind_speed_10m }}", "weatherCode": "{{ forecast.body.current.weather_code }}" } } } } ]}You’ll still need to add a webhook trigger separately — triggers aren’t included in the clipboard JSON. See Importing and Copying Workflows for the full clipboard reference.
What you just learned
Section titled “What you just learned”In ten minutes you used:
| Concept | Where it showed up |
|---|---|
| Triggers | The webhook turned the workflow into an HTTP endpoint |
| Step IDs | geocode, forecast, respond — the names you reference later |
| Template syntax | {{ initial.city }}, {{ geocode.body.results[0].latitude }} |
| Multi-step data flow | The forecast URL referenced the geocode step’s output |
| Return step | Shaping the webhook response and flipping the workflow to sync mode |
| Sync vs async detection | QuickFlo automatically switched to sync mode because you added a Return step |
| Executions | Every test run was recorded for inspection |
That’s the whole platform in microcosm. Everything else — AI agents, data stores, dashboards, sub-workflows, environments, connections, retries, conditional branches — composes the same way.
What to build next
Section titled “What to build next”- Browse the Workflow Library for ready-to-paste recipes covering AI agents, post-call automation, lead enrichment, scheduled syncs, and more.
- Try the AI Builder — press Cmd+I in any workflow and describe what you want in plain language. The AI Builder will create the steps for you.
- Add an AI step to the weather workflow — pipe the forecast through an LLM Call and have it write a one-sentence “interesting fact about today’s weather in this city.”
- Authenticate the webhook — flip on Authentication in the trigger config and add a
Bearerheader to yourcurlcalls. See Webhook Triggers. - Read the Core Concepts page for the mental model behind everything.
- Browse the step library to see every step type available.