Triggers
Triggers define when and how a workflow executes. Every workflow can have one or more triggers, and each trigger type gives you a different way to start an execution — from an HTTP request, a cron schedule, a form submission, or an external event.
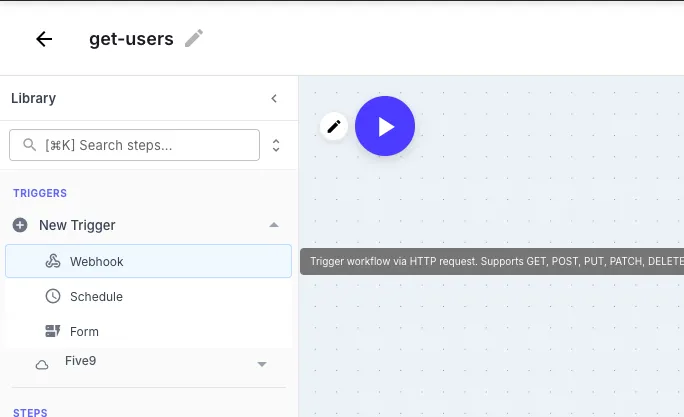
Webhook Triggers
Section titled “Webhook Triggers”Webhook triggers turn your workflow into an API endpoint. QuickFlo generates a unique URL that accepts HTTP requests — when a request comes in, the workflow executes with the request data as input and can return a fully customizable HTTP response.
This means you can build complete REST APIs, webhook receivers, and backend services entirely inside QuickFlo.

Configuration
Section titled “Configuration”| Field | Description |
|---|---|
| Name | Human-readable identifier — also used as the URL slug (e.g., query-leads becomes https://run.quickflo.app/w/...query-leads) |
| Method | HTTP method the endpoint accepts — GET, POST, PUT, PATCH, or DELETE |
| Authentication | When enabled, generates a Webhook Secret — callers can pass it three ways: as a Bearer token in the Authorization header, in an X-Webhook-Token header, or as a ?token= query parameter |
| Expose Errors | When enabled, error details from failed executions are returned in the HTTP response instead of a generic error |
Accessing Request Data
Section titled “Accessing Request Data”The full HTTP request is available in your workflow via {{ initial.* }}:
{{ initial.name }} // body field{{ initial.webhook.query.page }} // query parameter{{ initial.webhook.headers['x-api-key'] }} // request header{{ initial.webhook.body }} // raw request body{{ initial.webhook.files }} // uploaded files (multipart)For JSON request bodies, all top-level fields are spread directly onto initial for convenience. See Template Syntax — Webhook Triggers for the full reference.
Returning Responses
Section titled “Returning Responses”By default, webhook-triggered workflows run asynchronously — the caller receives a 202 Accepted response with an executionId immediately. To return a custom response, add a Return step to your workflow. QuickFlo detects this automatically and switches to synchronous execution so the caller waits for the result.
The Return step’s Webhook Response tab lets you configure the status code, response type, and body. QuickFlo supports three response formats:
JSON Response
Section titled “JSON Response”Return structured JSON data with key-value pairs. Use template expressions to include data from any step in the workflow.
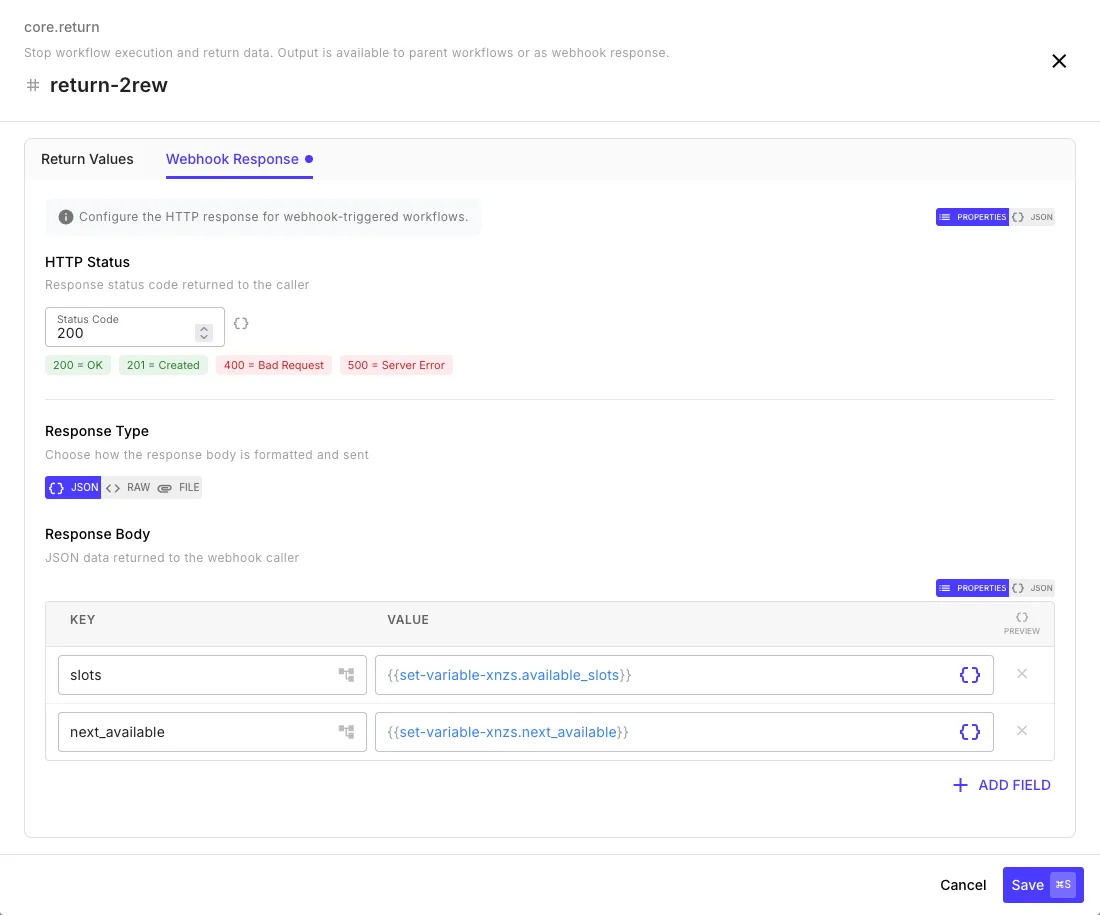
| Field | Description |
|---|---|
| Status Code | HTTP status code (200, 201, 400, 500, etc.) |
| Response Body | Key-value pairs — each key becomes a JSON field in the response |
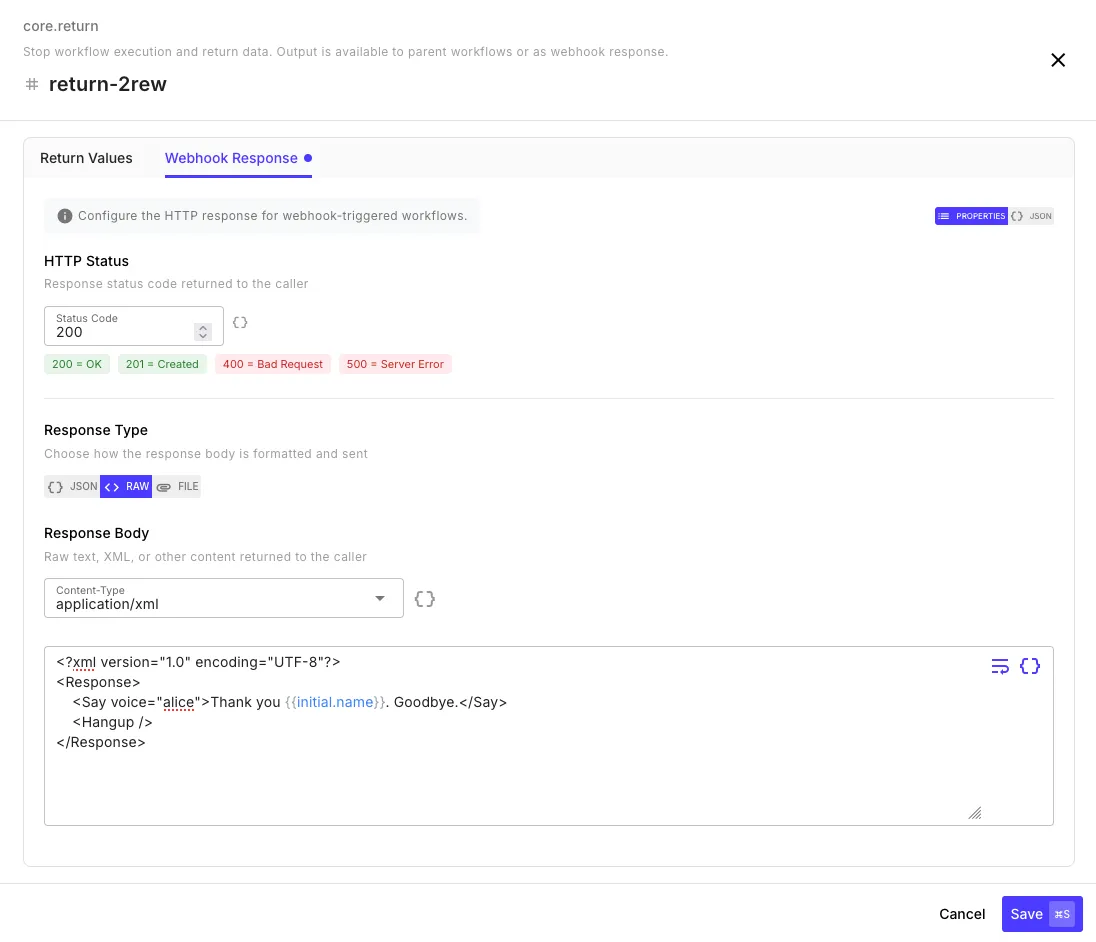
Raw Response (XML, Text, HTML)
Section titled “Raw Response (XML, Text, HTML)”Return raw text content with a custom Content-Type. Perfect for XML APIs, plain text responses, HTML pages, or any non-JSON format.
| Field | Description |
|---|---|
| Content-Type | MIME type for the response (e.g., application/xml, text/plain, text/html) |
| Response Body | Raw text content — supports template expressions |
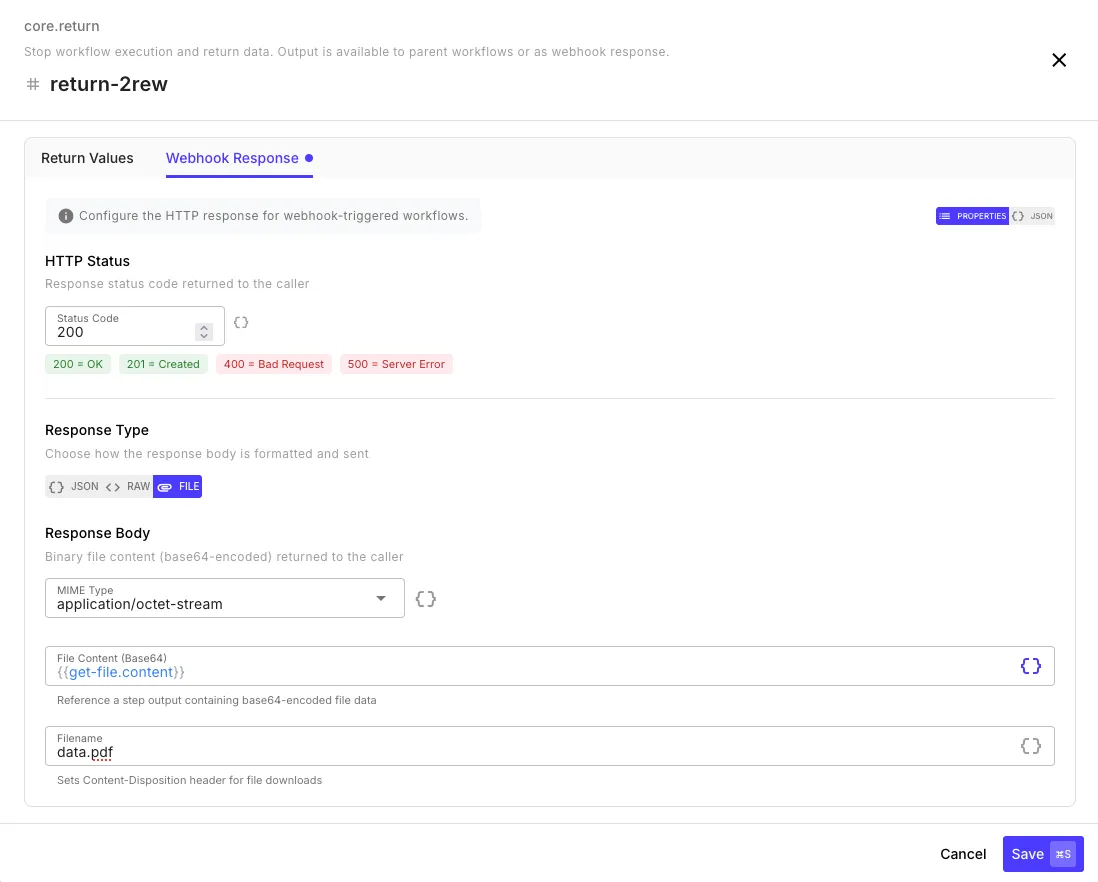
File Response
Section titled “File Response”Return binary file content for downloads. The caller’s browser receives a file download prompt with the filename you specify.
| Field | Description |
|---|---|
| MIME Type | File content type (e.g., application/pdf, text/csv, application/octet-stream) |
| File Content (Base64) | Base64-encoded file data — reference a step output containing the file content |
| Filename | The download filename (e.g., report.pdf) — sets the Content-Disposition header |
Custom Response Headers
Section titled “Custom Response Headers”The Response Headers section at the bottom of the Webhook Response tab adds arbitrary headers to the HTTP response — useful for CORS, caching directives, request tracing, or any custom header your caller expects. Works with all three response types (JSON, Raw, File).
| Field | Description | Example |
|---|---|---|
| Header | Header name | X-Request-Id |
| Value | Header value — supports template expressions | {{ start.id }} |
Reserved transport headers (Content-Length, Transfer-Encoding, Connection, Keep-Alive, Host) are ignored — those are managed by the HTTP layer. Content-Type and Content-Disposition set via the Content Type / Filename fields take precedence over the same header configured in Response Headers.
Example: Building a REST API
Section titled “Example: Building a REST API”curl https://run.quickflo.app/w/@QMnb/query-leads \ -H "Authorization: Bearer <secret>" \ -H "Content-Type: application/json" \ -d '{"region": "US", "limit": 10}'The Return step shapes the JSON the caller gets back:
{ "leads": [ { "id": "lead_8f2a", "name": "Acme Co", "region": "US" } ], "count": 1}Scheduled Triggers
Section titled “Scheduled Triggers”Schedule triggers run workflows automatically on a recurring basis using cron expressions. Use them for periodic data syncs, report generation, cleanup tasks, or any automation that runs on a timer.
Configuration
Section titled “Configuration”| Field | Description |
|---|---|
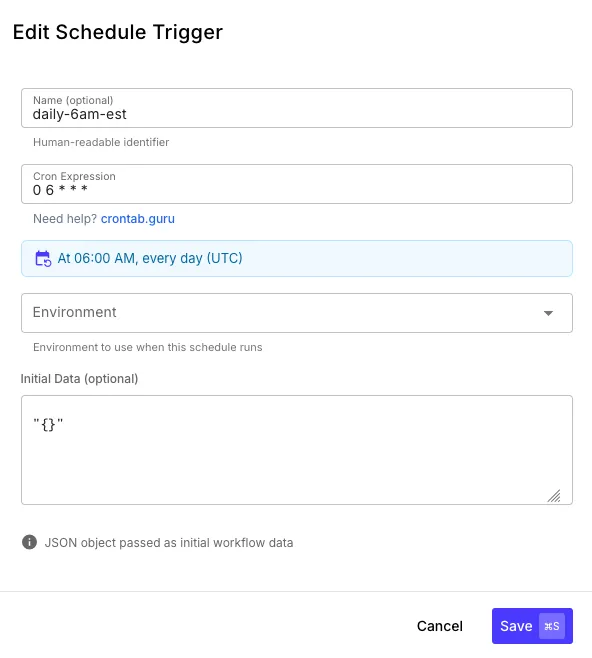
| Name | Human-readable identifier (e.g., daily-6am-est) |
| Cron Expression | Standard 5-field cron syntax — minute, hour, day-of-month, month, day-of-week |
| Timezone | IANA timezone the cron runs in (e.g., UTC, America/New_York, Europe/London). Defaults to UTC. |
| Environment | Which environment to use when the schedule fires (loads that environment’s variables and connections) |
| Initial Data | Optional JSON object passed as {{ initial.* }} to the workflow on each execution |
Cron Expression Examples
Section titled “Cron Expression Examples”| Expression | Schedule |
|---|---|
0 6 * * * | Every day at 6:00 AM (UTC) |
0 9 * * 1-5 | Weekdays at 9:00 AM |
*/15 * * * * | Every 15 minutes |
0 0 1 * * | First day of every month at midnight |
0 */2 * * * | Every 2 hours |
30 8 * * 1 | Every Monday at 8:30 AM |
QuickFlo displays a human-readable summary of the cron expression below the input field (e.g., “At 06:00 AM, every day (UTC)”). Need help building expressions? The config links to crontab.guru.
Passing Initial Data
Section titled “Passing Initial Data”The Initial Data field accepts a JSON object that becomes available in the workflow as {{ initial.* }}:
{ "reportType": "daily", "emailTo": "admin@example.com"}{{ initial.reportType }} // "daily"{{ initial.emailTo }} // "admin@example.com"This is useful for parameterizing a single workflow that runs on multiple schedules with different configurations — for example, one schedule for a daily report and another for a weekly summary, both using the same workflow with different reportType values.
Form Triggers
Section titled “Form Triggers”Form triggers let you create hosted forms with a drag-and-drop builder that trigger a workflow on submission. Forms support custom branding, field validation, password protection, file uploads, CSV bulk submission, and fully customizable response screens.
See the Form Triggers guide for the complete walkthrough.
Chat Triggers
Section titled “Chat Triggers”A chat trigger is a form trigger in Chat mode — same builder, same auth, same hosted page chrome, but the runtime body is an agent chat instead of a form. Switching modes is one toggle in Form Settings.
For the agent setup itself (system prompt, tools, approvals, memory bank, hosted-page UX), see the Chat Agents guide. For the form-config details specific to chat mode, see Chat Triggers.
Event Triggers
Section titled “Event Triggers”Event triggers listen for real-time events from connected services. When a matching event occurs, the workflow starts automatically with the event payload as input data.
Event triggers are configured by selecting a connection and an event type. The available events depend on the connected service.
Available Event Trigger Types
Section titled “Available Event Trigger Types”| Type | Description |
|---|---|
| Five9 Supervisor | Real-time WebSocket events from Five9 Supervisor — agent state changes, queue updates, ACD events, and more |
| Five9 ESS | Inbound webhook events from Five9 Event Subscription Service (ESS) — call lifecycle events, post-call data, IVR routing |
Accessing Event Data
Section titled “Accessing Event Data”Event payloads are spread directly onto {{ initial.* }}:
{{ initial.eventType }}{{ initial.data.agentId }}{{ initial.data.newState }}The structure of the event data depends on the source service. Check the event payload in the Executions panel after a test event to see the exact field structure.
Multiple Triggers
Section titled “Multiple Triggers”A single workflow can have multiple triggers of different types. For example, you might have:
- A webhook trigger for on-demand API calls
- A schedule trigger for nightly batch processing
- A form trigger for manual submissions from an internal team
All triggers feed into the same workflow — the trigger type and data are available via {{ initial.* }}. Use the Executions page to see which trigger started each execution.