Getting Started
This guide walks you through building your first workflow — from creating a canvas to triggering it with a webhook. For background on what QuickFlo is and how it compares to other platforms, see Why QuickFlo.
1. Create a Workflow
Section titled “1. Create a Workflow”Click New Workflow from the Workflows page. You’ll land in the workflow builder — a visual canvas where you drag, connect, and configure steps.
2. Add Steps
Section titled “2. Add Steps”Click the + button on the canvas or drag from the step catalog. Every step has a configuration form where you set inputs, reference previous step outputs, and connect to external services.
Common first steps:
| Step | What it does |
|---|---|
| HTTP Request | Call any API — GET, POST, PUT, DELETE with headers, body, and auth |
| Set Variable | Store a value for use in later steps |
| If / Switch | Branch your workflow based on conditions |
| For Each | Loop over arrays and process each item |
| LLM Call | Send a prompt to an AI model and get a response |
3. Wire Up Data
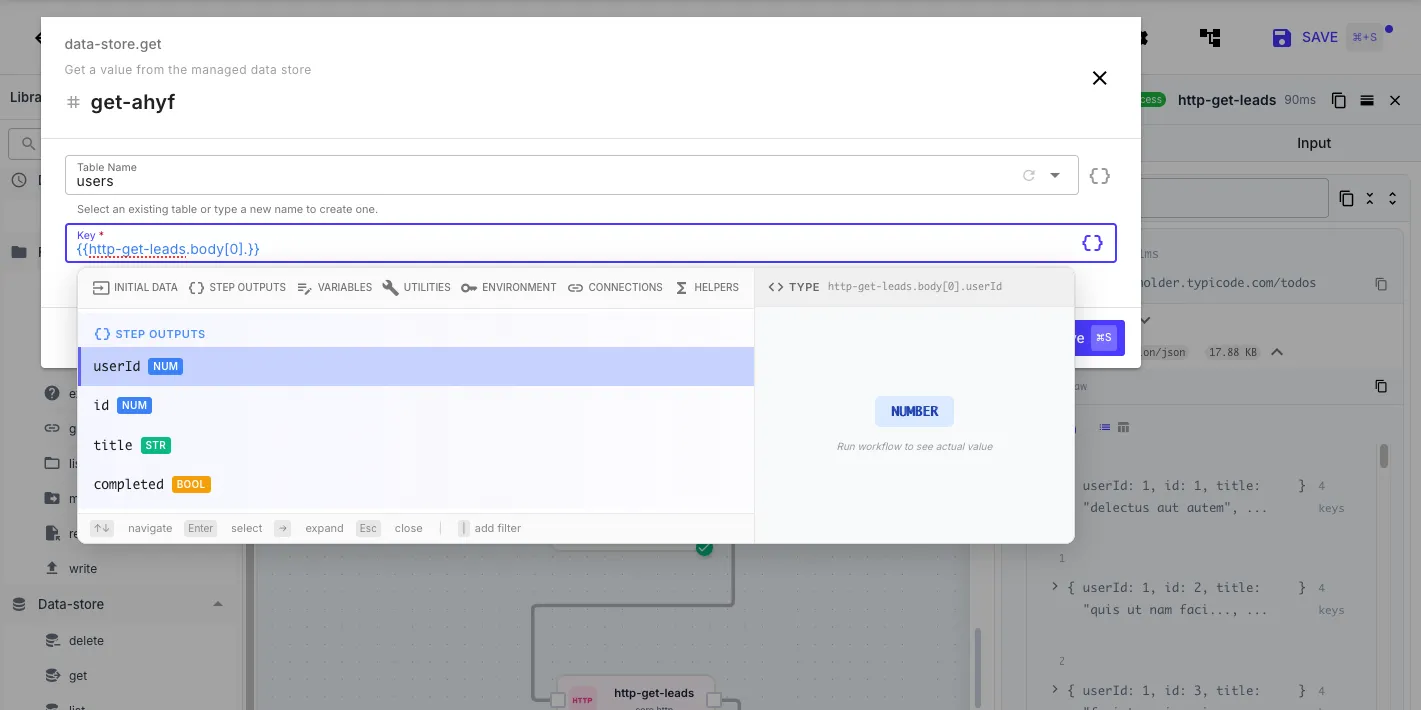
Section titled “3. Wire Up Data”Reference output from previous steps using template syntax:
{{ http-get-leads.body[0].userId }}The template autocomplete dropdown shows all available variables as you type — step outputs, initial data, environment variables, connections, and utilities.
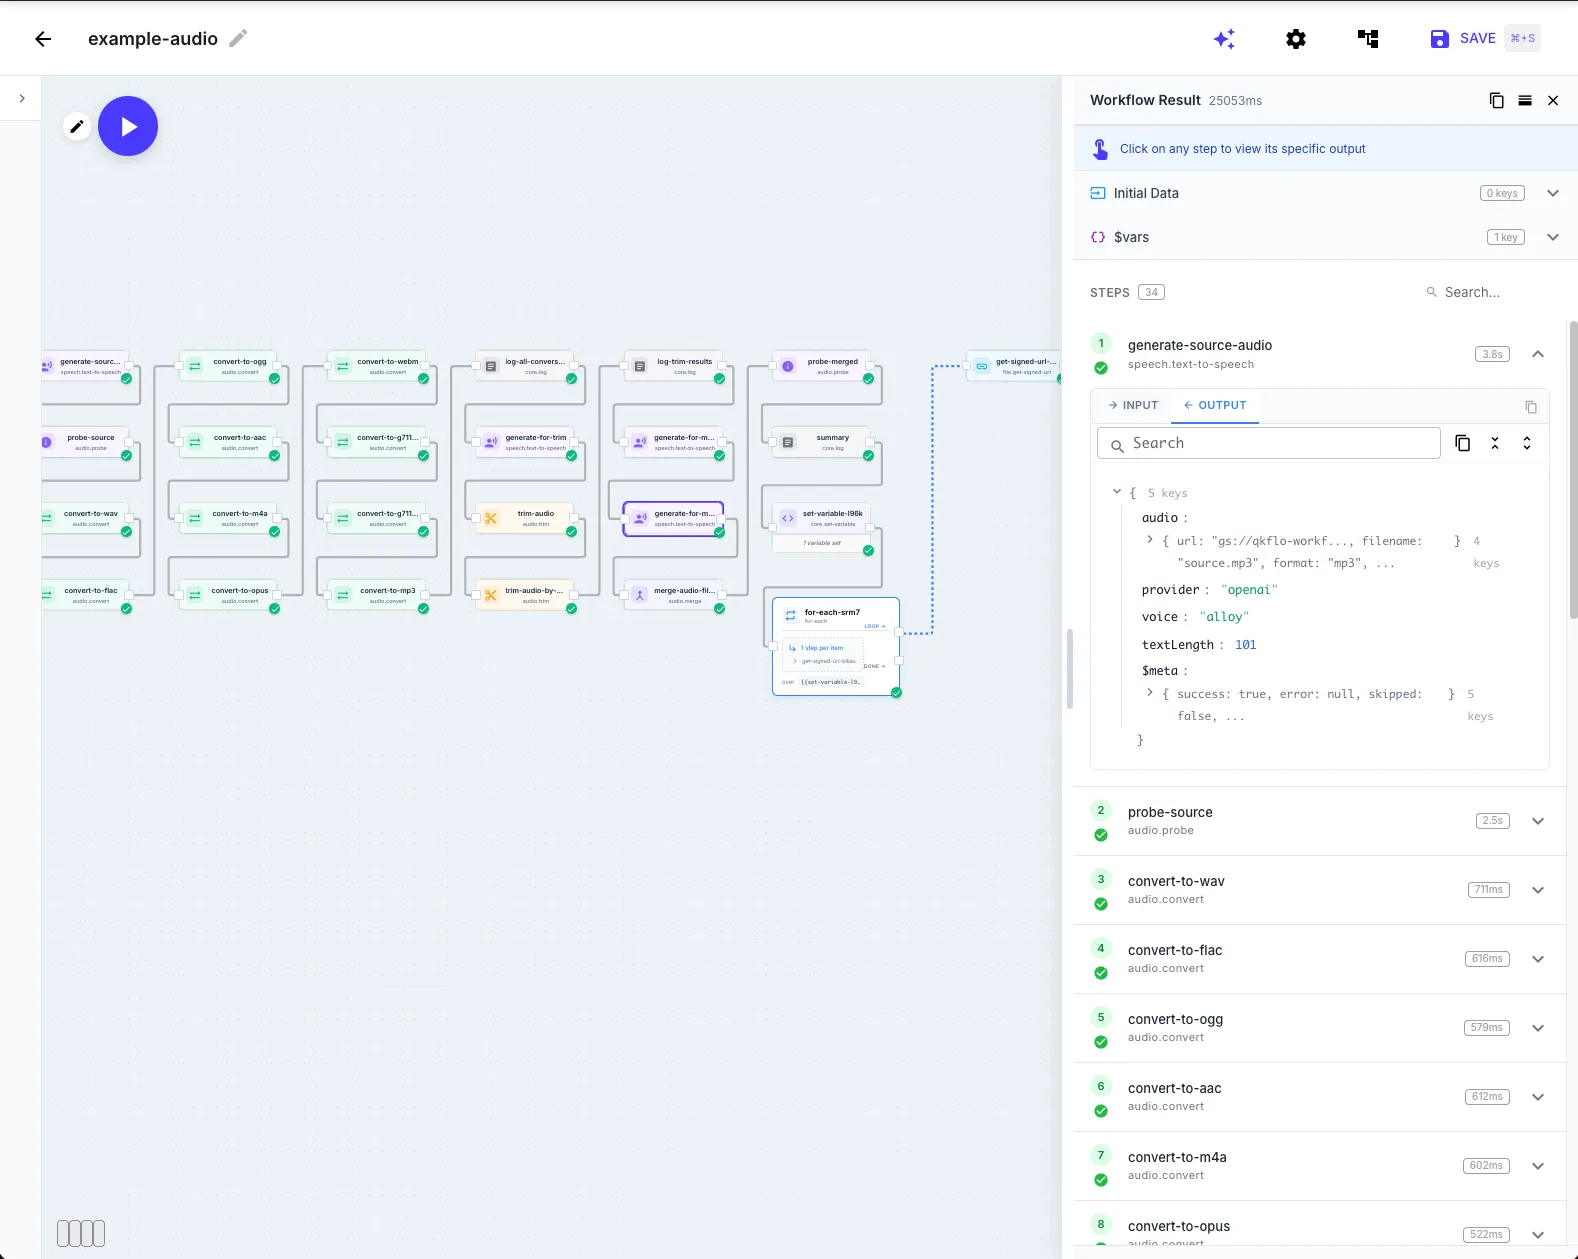
4. Run Your Workflow
Section titled “4. Run Your Workflow”Hit the Play button (or Cmd+Enter) to execute the workflow manually. The execution output panel shows each step’s result, timing, and any errors in real-time.
5. Add a Trigger
Section titled “5. Add a Trigger”To run your workflow automatically, add a trigger:
- Webhook — gives your workflow a URL that starts execution when called
- Schedule — run on a cron schedule (every hour, daily at 9am, etc.)
- Form — generate a form UI that triggers the workflow on submission
- Event — react to events from connected services
Testing with a Webhook
Section titled “Testing with a Webhook”The fastest way to trigger a workflow externally:
- Open Triggers and add a Webhook trigger
- Save the workflow — you’ll get a unique webhook URL
- Send a request to test it:
curl -X POST https://run.quickflo.app/w/@YourOrgSuid/your-named-webhook-trigger \ -H "Content-Type: application/json" \ -d '{"name": "John", "email": "john@example.com"}'- The request body fields are available as
{{ initial.name }},{{ initial.email }}, etc.
Key Concepts
Section titled “Key Concepts”| Concept | Description |
|---|---|
| Steps | Building blocks — HTTP requests, data transforms, AI calls, control flow |
| Triggers | What starts the workflow — webhooks, schedules, forms, events |
| Template Syntax | LiquidJS expressions to reference data and transform values |
| Connections | Authenticated links to external services (OAuth, API keys) |
| Environments | Encrypted variables and connection redirection for staging/production |
| Data Stores | Persistent key-value storage across workflow executions |
| Knowledge Bases | Document collections for AI-powered semantic search |
| AI Builder | Build workflows from natural language descriptions |
Importing Workflows
Section titled “Importing Workflows”You can paste workflow definitions directly into the builder. Copy a workflow JSON to your clipboard and press Cmd+V (Mac) / Ctrl+V (Windows) on the canvas — the steps will appear automatically.
See Importing and Copying Workflows for details on the JSON format and copy/paste features.