Environments
Environments are named collections of encrypted key-value variables scoped to your organization. They let you store configuration like API keys, database URLs, and connection references securely, and reference them in any workflow using $env.
Creating an Environment
Section titled “Creating an Environment”-
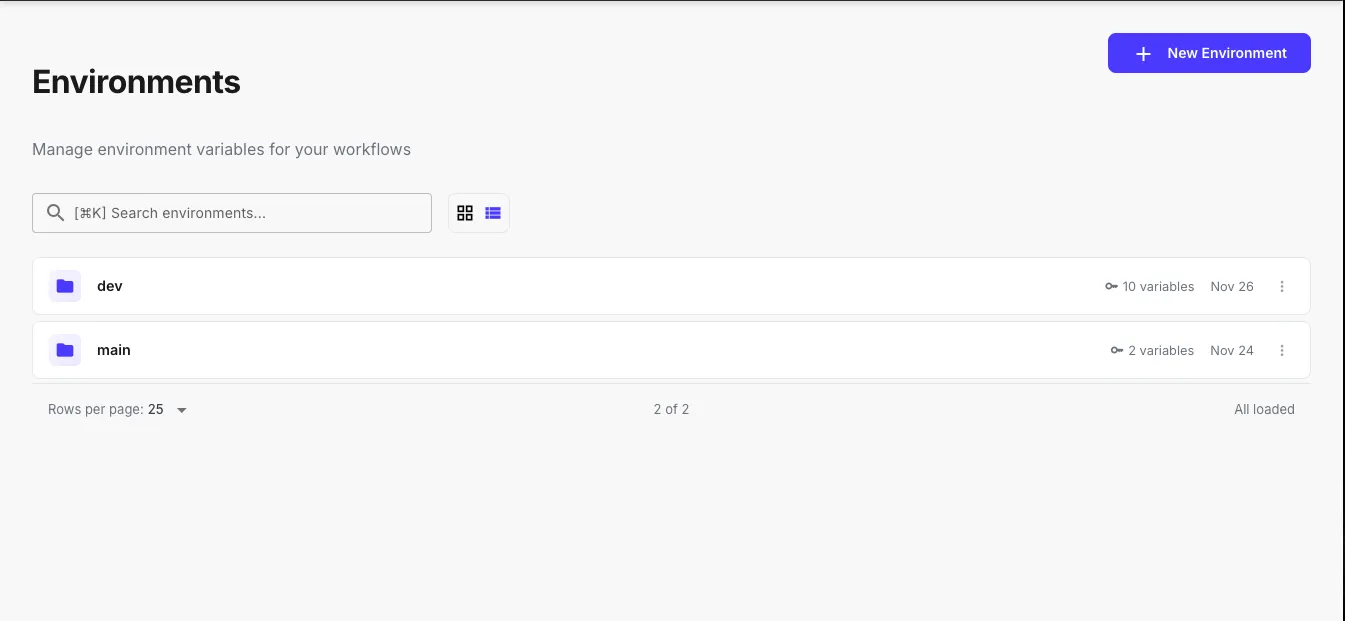
Navigate to Environments in the QuickFlo sidebar
-
Click New Environment
-
Give it a name (e.g.,
production,staging,dev) -
Add variables as key-value pairs. Values are encrypted at rest.
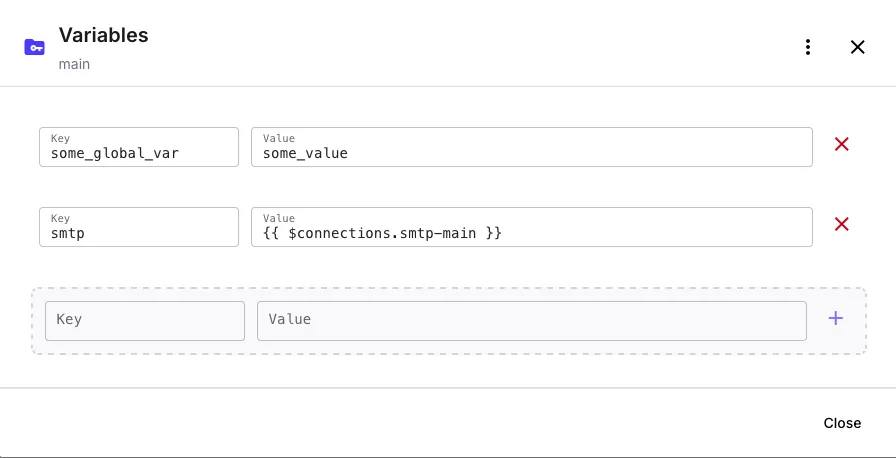
You can also import variables from a .env file using the import button in the variables dialog. Imported variables are merged with the existing set — duplicate keys are overwritten by the imported values.
Referencing Environment Variables
Section titled “Referencing Environment Variables”Use $env in any template expression within your workflow steps:
{{ $env.API_KEY }}{{ $env.DATABASE_URL }}{{ $env.WEBHOOK_SECRET }}Default Environment
Section titled “Default Environment”Each workflow can have a default environment set in its workflow settings. Variables from the default environment are accessible directly under $env:
{{ $env.API_KEY }}Accessing Other Environments
Section titled “Accessing Other Environments”Variables from non-default environments are scoped by their environment name:
{{ $env.staging.API_KEY }}{{ $env.production.DATABASE_URL }}Setting a Workflow’s Default Environment
Section titled “Setting a Workflow’s Default Environment”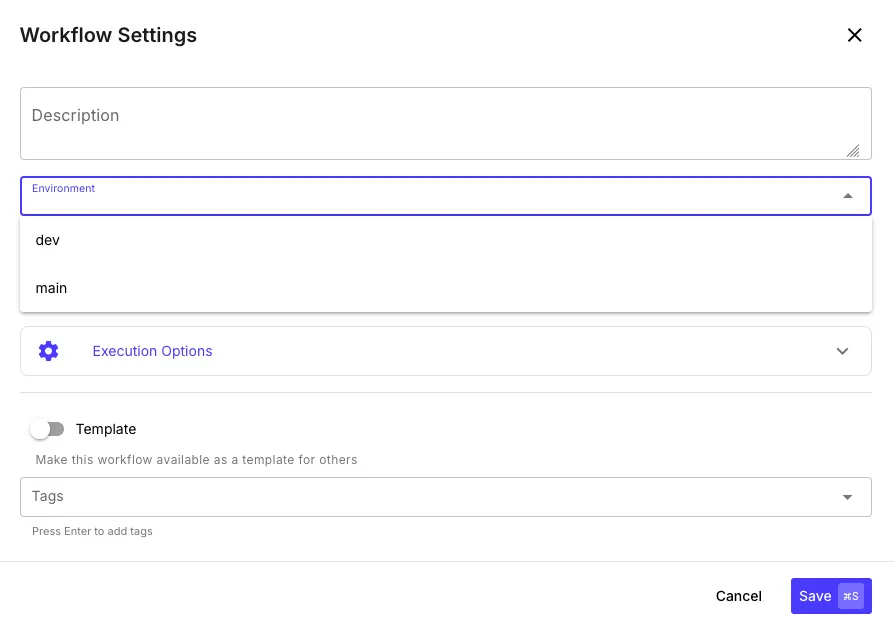
- Open a workflow in the builder
- Open Workflow Settings
- Select the default environment from the dropdown
- Save the workflow
When the workflow executes, variables from the selected environment are loaded and decrypted automatically.
Connection Redirection
Section titled “Connection Redirection”One of the most powerful features of environments is connection redirection — storing a connection template reference inside an environment variable so the same workflow can use different connections depending on which environment is active.
How It Works
Section titled “How It Works”QuickFlo’s template engine supports up to 5 levels of recursive resolution. When an environment variable contains a template expression like {{$connections.some-connection}}, the engine resolves it to the actual connection object.
Example
Section titled “Example”Say you have two Salesforce connections: salesforce-prod and salesforce-staging.
-
Create environment variables that reference each connection:
In your
productionenvironment:Key Value SF_CONNECTION{{$connections.salesforce-prod}}In your
stagingenvironment:Key Value SF_CONNECTION{{$connections.salesforce-staging}} -
Reference the environment variable in your workflow step’s connection field:
{{ $env.SF_CONNECTION }} -
Set the workflow’s default environment to
productionorstaging
Now the same workflow definition uses the correct Salesforce connection depending on which environment is active — no step changes needed.
Switching Environments at Runtime
Section titled “Switching Environments at Runtime”For webhook-triggered workflows, you can override the default environment per request using the env query parameter:
curl -X POST "https://run.quickflo.app/w/@YourOrgSuid/your-named-webhook-trigger?env=staging" \ -H "Content-Type: application/json" \ -d '{"userId": "123"}'This lets you test the same workflow against different environments without changing any configuration — just add ?env=production or ?env=staging to the webhook URL.
Security
Section titled “Security”- All environment variable values are encrypted at rest using organization-scoped encryption keys
- Variables are only decrypted in memory during workflow execution
- Access is controlled by organization-level RBAC — users can only see environments in their own organization
- Variable keys are stored in plain text for searchability; only values are encrypted
Variable Limits
Section titled “Variable Limits”- Key length: Up to 255 characters
- Value length: Up to 10,000 characters
- Name format: Must match
^[a-zA-Z_][a-zA-Z0-9_-]*$
Managing Variables
Section titled “Managing Variables”You can manage variables through the UI or the API:
- Add/edit individual variables from the environment detail page
- Bulk import from a
.envfile - Bulk delete multiple variables at once
- API access is available for programmatic management via access tokens