
Chat Agents
Build a chat agent and put it on a public URL in three minutes. Write a system prompt, pick the workflows the agent can call, save. Streaming, multi-turn memory, history, approvals, idle timeouts, reconnect-on-drop — you don’t configure any of that. It’s just there.
Make Your First Chat Agent
Section titled “Make Your First Chat Agent”-
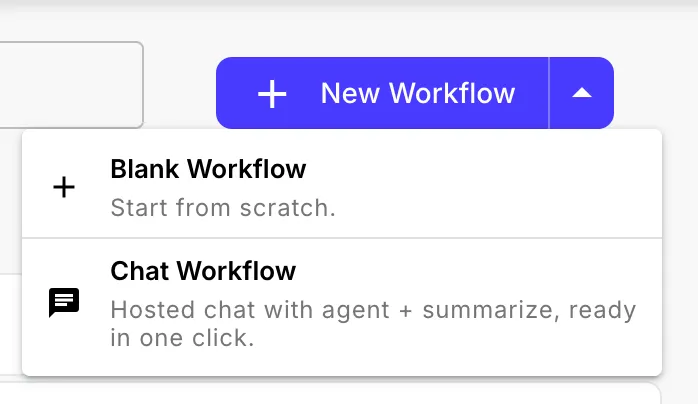
Click New Workflow → Chat Workflow. Workflow, chat trigger, agent step, and a chat-ended summarize workflow — all pre-wired.
-
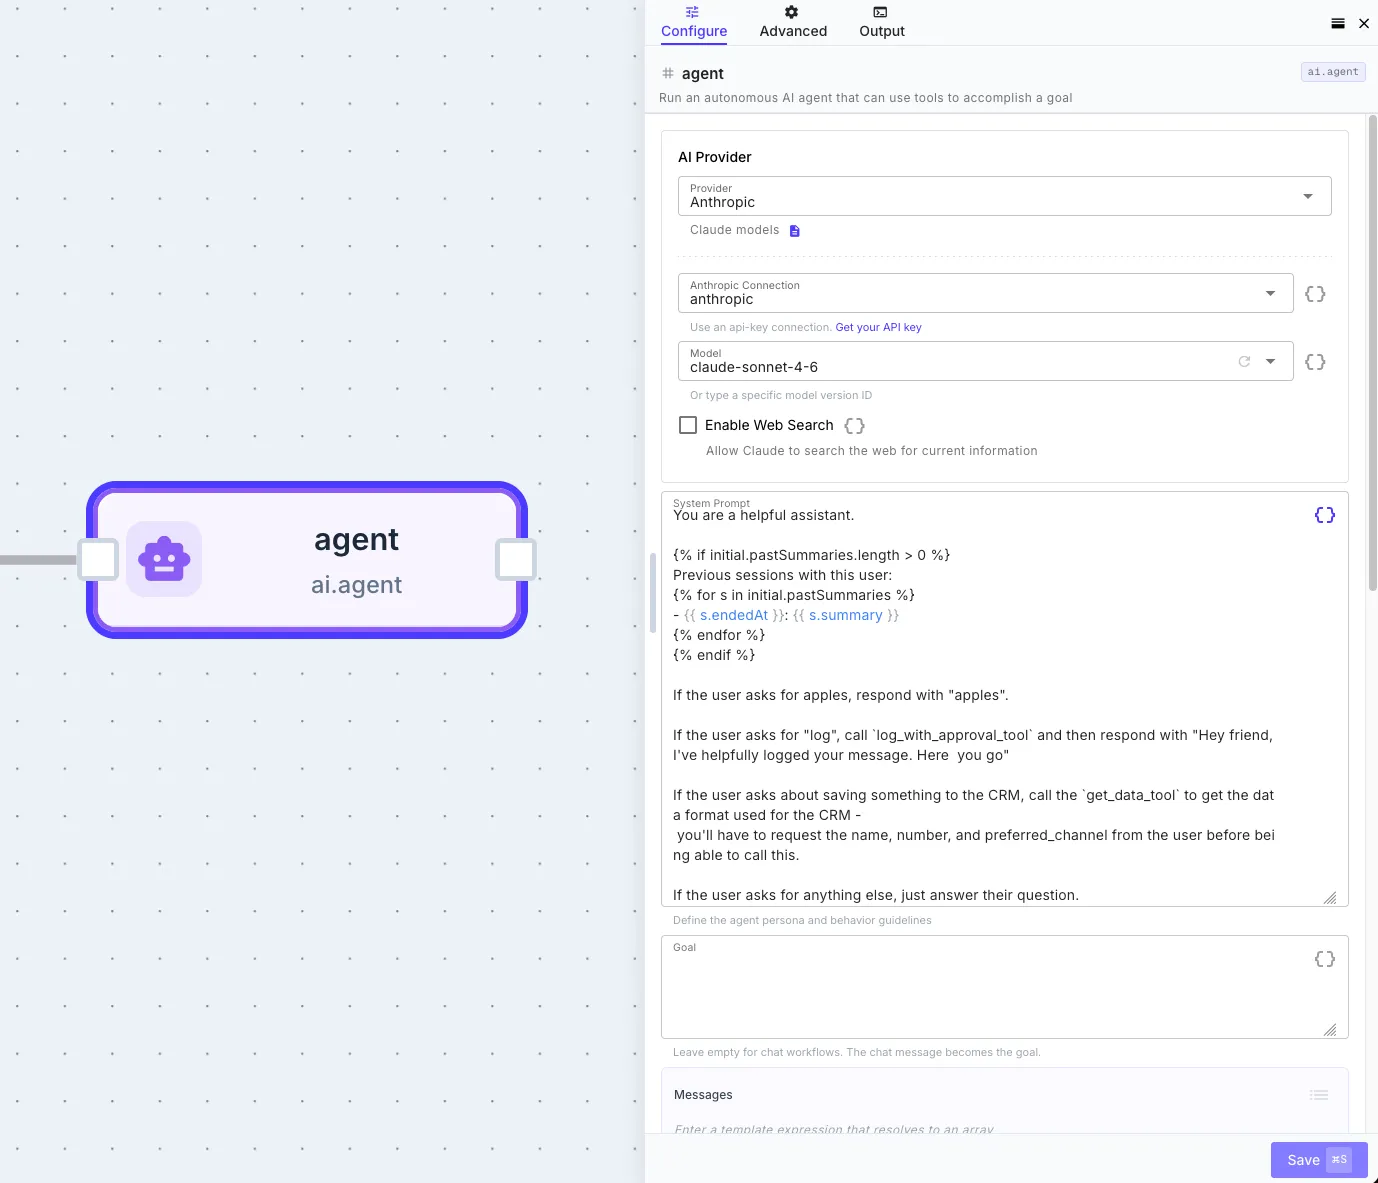
Configure the two agent steps — one in the main workflow (your chatbot), one in the chat-ended workflow (summarizes the conversation when the session ends, feeds the memory bank). Each one needs a model, a system prompt, and tools.
-
Click the form URL in the builder header. Send a message. You’re chatting with your agent.
That’s the whole flow. Below is everything else you might want to do.
What End Users See
Section titled “What End Users See”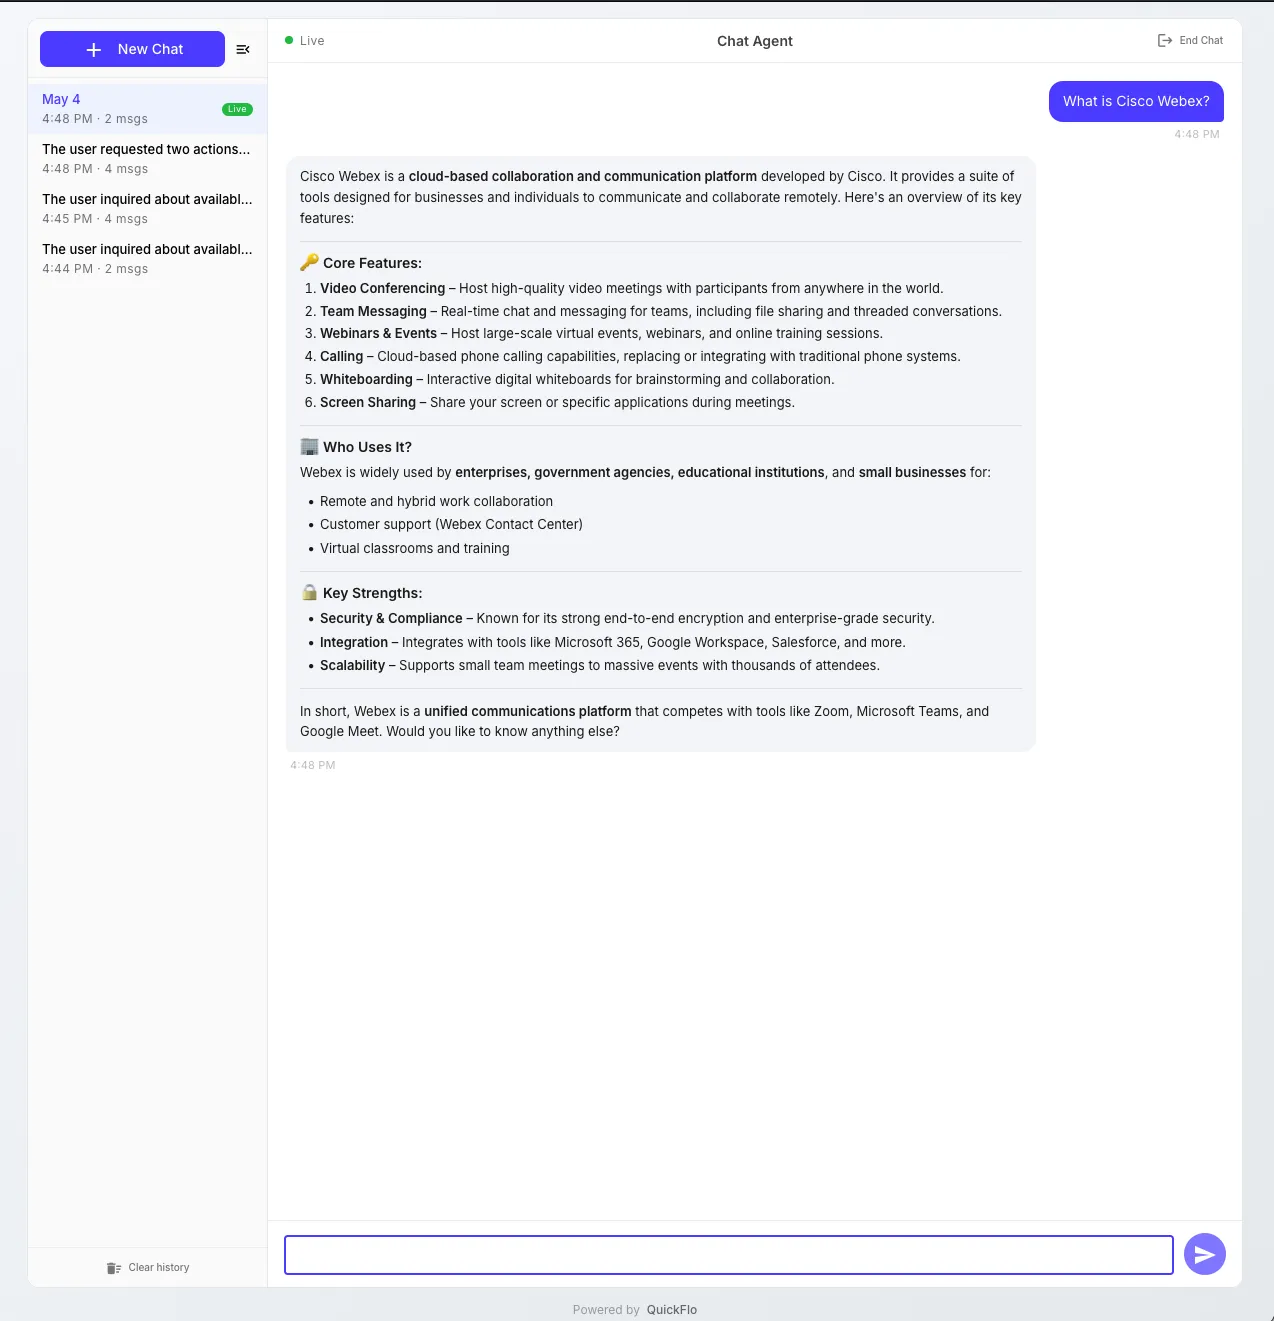
- Streaming agent — replies appear word by word, like ChatGPT.
- Tool cards — when the agent uses a workflow, an inline card shows the tool name, status, and how long it took. Click to expand and see the arguments.
- Multi-turn memory — the agent remembers what was said earlier in the conversation.
- Sidebar history — past sessions are listed on the left. “New Chat” starts a fresh one. Past transcripts open read-only.
Approvals, reconnect-on-drop, and idle timeouts ship by default too — covered below.
Embed on Your Site
Section titled “Embed on Your Site”Drop the chat into an iframe. You can add ?embed=true so that the chat renders without the outer page chrome:
<iframe src="https://go.quickflo.app/f/@your-org/your-chat?embed=true" width="100%" height="600" style="border: 0"></iframe>For customer-facing widgets you usually want even less chrome — no past-sessions sidebar, no tool-call cards. Toggle Hide chat history sidebar and Hide tool-call cards under Form Settings → Chat Behavior, or override per-page with query params:
<!-- Public lead-gen widget — minimal chrome --><iframe src="https://go.quickflo.app/f/@your-org/your-chat?embed=true&history=false&tool_cards=false"></iframe>Tool output — files, images, link cards, action buttons, any text the tool returns — still renders even with cards hidden. Only the “calling tool …” chips are suppressed.
Mobile auto-embeds: if a user lands on the public URL from a phone, the page renders in embed mode automatically.
Any extra query param is treated as a pre-fill for a pre-chat field — ?embed=true&name=Steve&account_id=42 skips the pre-chat form entirely if every field is provided.
System Prompt
Section titled “System Prompt”Where you shape the agent’s behavior. Patterns that work:
You're a helpful assistant for {{ initial.account.company }}.
When users ask about their data, use the `lookup_account` tool.When users want to make changes, use the `update_account` tool —  this will require their approval before running.
Be concise. Don't apologize unnecessarily.
Liquid templates work in the prompt — {{ initial.name }} from a pre-chat form, {{ prefill.account.tier }} from a pre-fill workflow. Tell the agent which tool to use when. Set tone and constraints declaratively.
A tool is a workflow. Any QuickFlo workflow is a tool.
Three pieces of your workflow’s metadata determine how the agent uses it:
- Workflow name → tool name the agent uses to invoke it.
- Workflow description → tool description the agent reads every turn to decide when to call it.
- Workflow’s initial input schema → tool input schema — the typed arguments the agent fills in on each call. Defined under Workflow Settings → Initial Input Schema.
Name, description, input schema. Treat them like API docs.
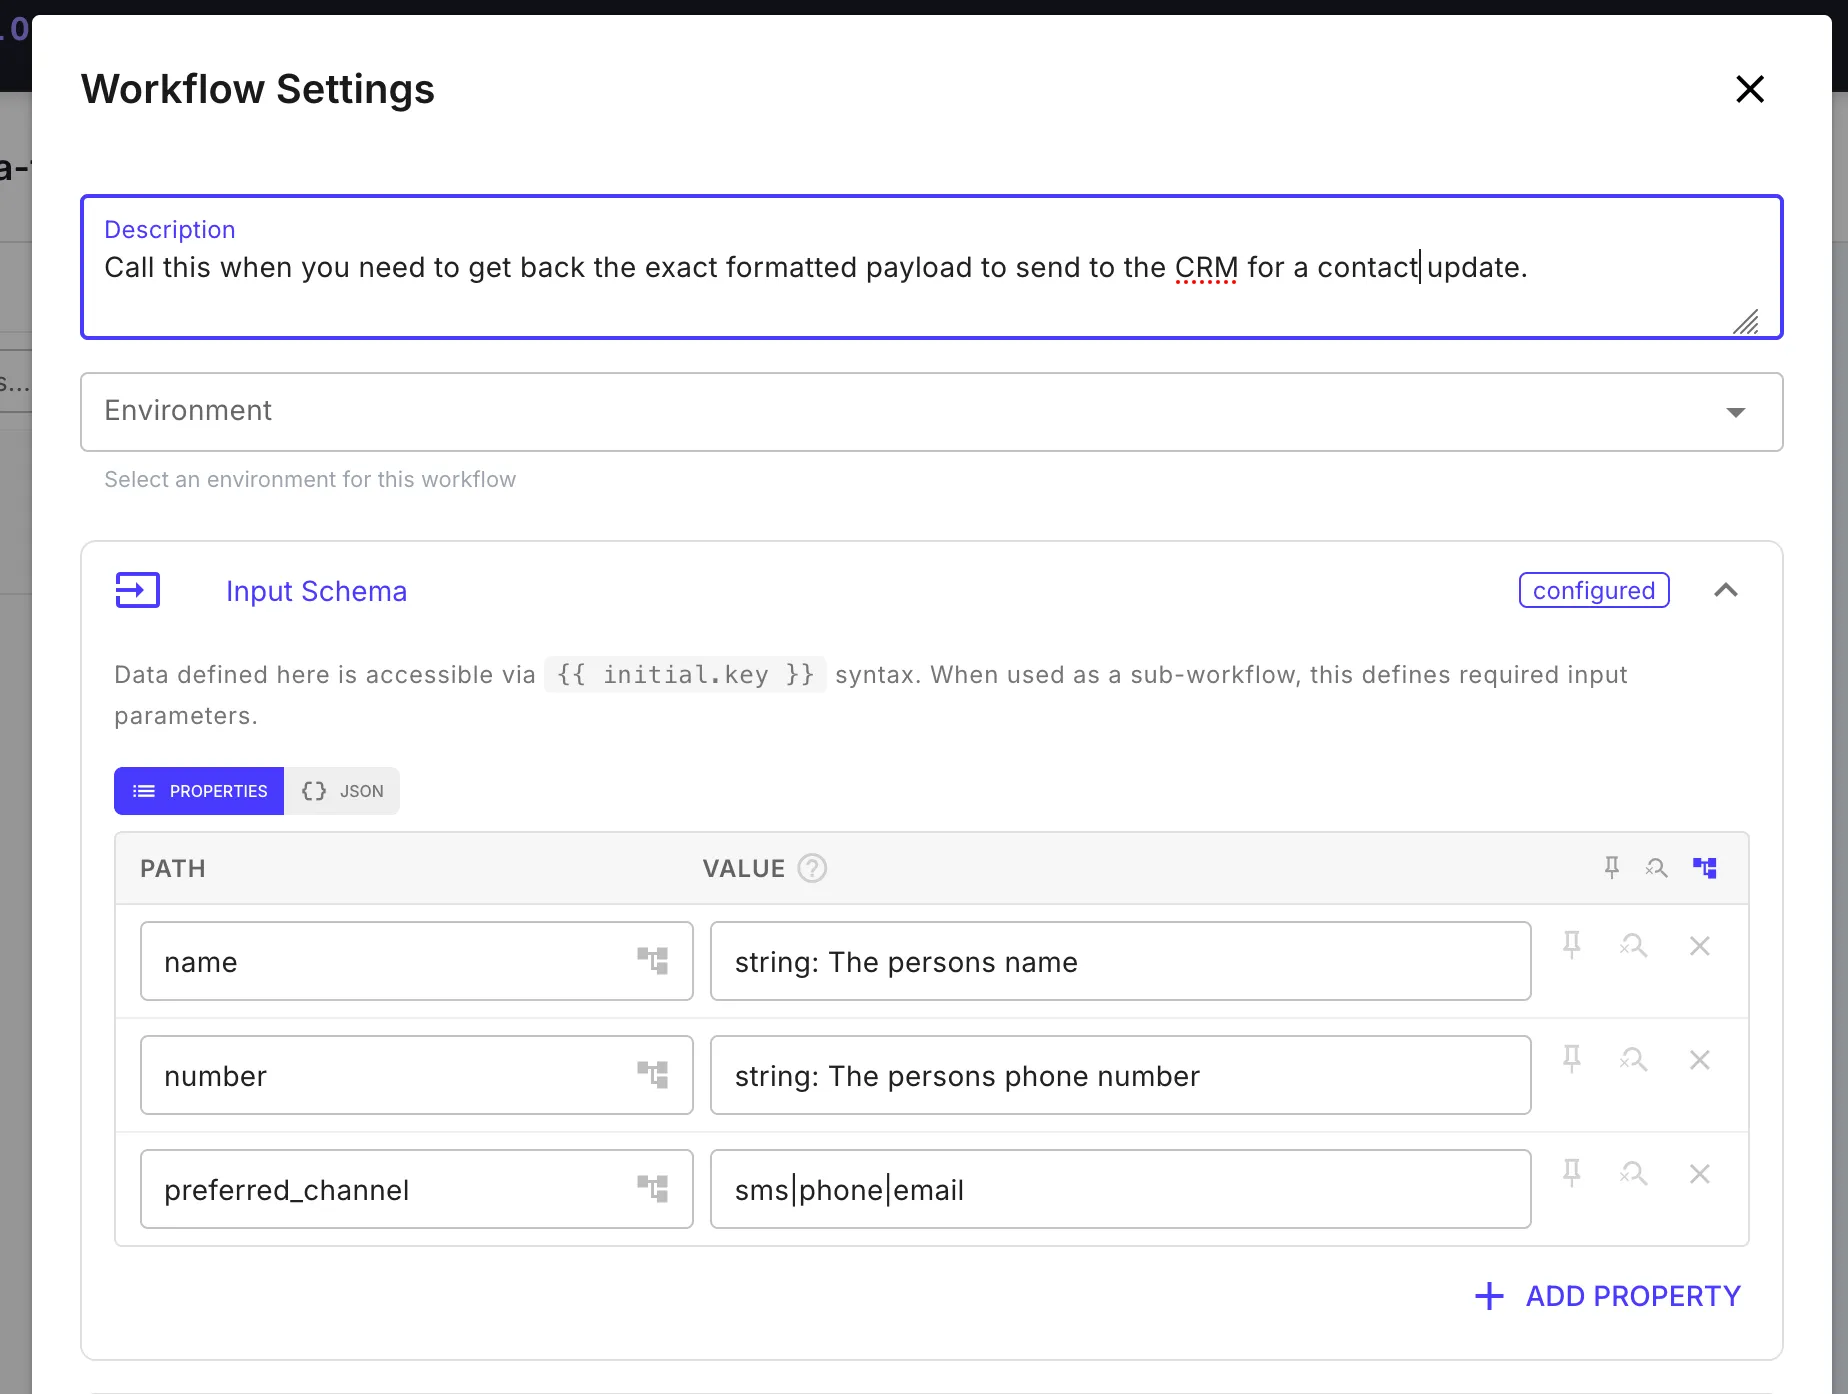
Then the workflow’s core.return step defines the output side — what the agent gets back from the tool, and what (if anything) shows up in the chat:
- Return Values tab → data the agent reasons over for the next iteration. Not shown to the user.
- Chat Response tab → content rendered inline in the chat (text, files, images, link cards, action buttons). Shown to the user, summarized for the agent.
You can set both. The agent sees the data; the user sees the chat response.
Approvals
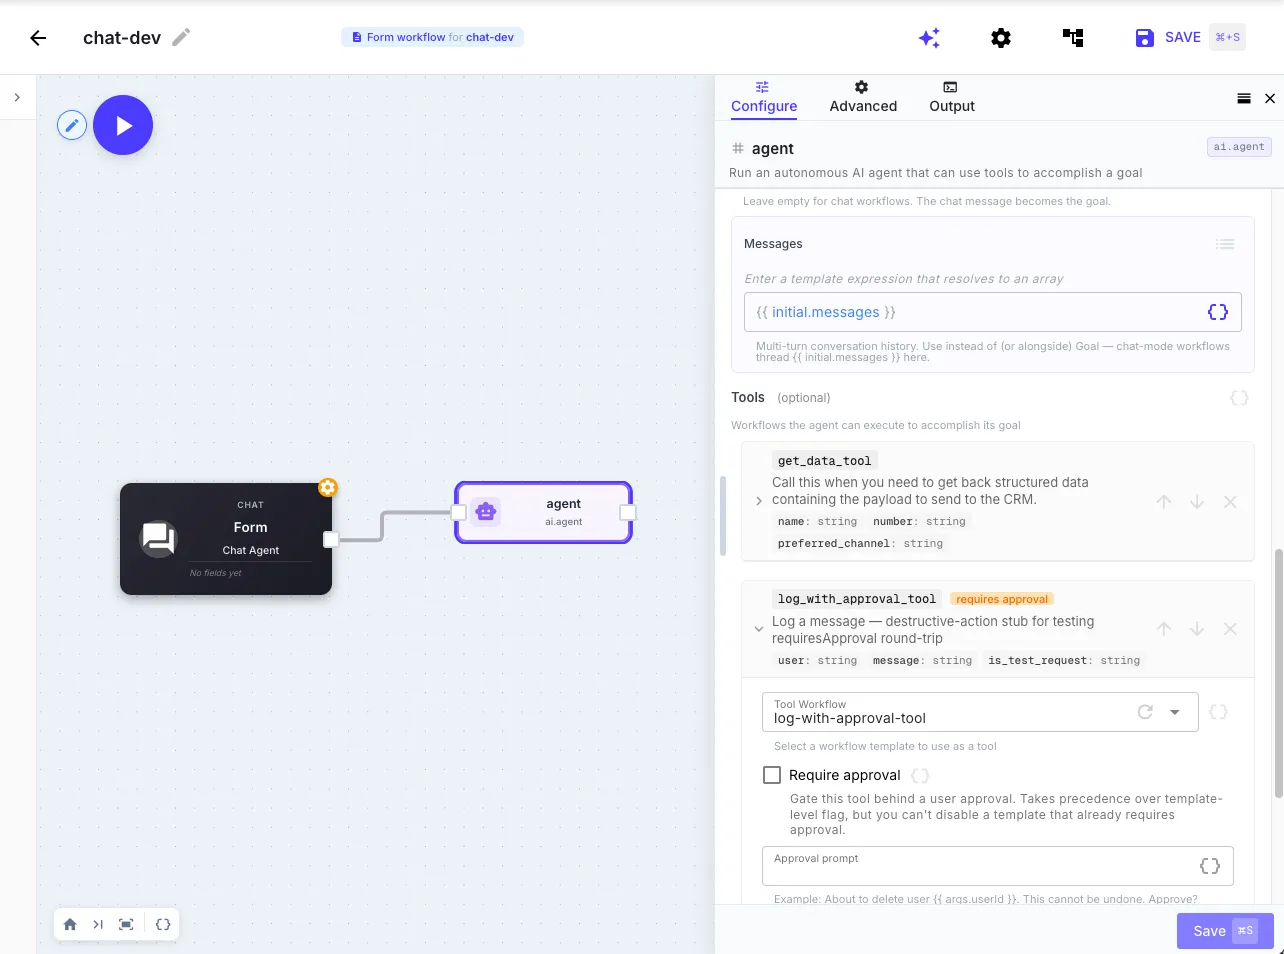
Section titled “Approvals”Some tools are dangerous — sending email, deleting records, charging a card. Toggle Require approval on the tool and you get this:
- The agent decides to call the tool.
- The chat shows a Permission needed card with Approve / Deny buttons. The agent pauses.
- Approve → the tool runs with the exact arguments the agent picked.
- Deny → the tool doesn’t run; the chat shows “Cancelled.”
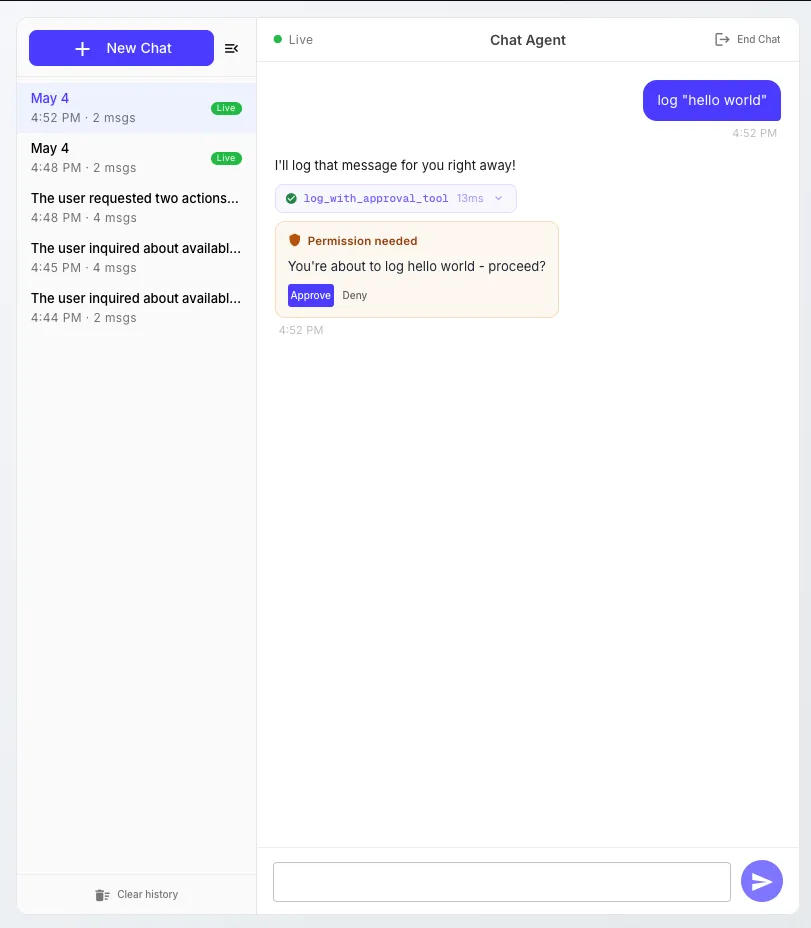
Optional: a custom approval prompt that shows the user what’s about to happen.
About to delete user {{ args.userId }} ({{ args.email }}).This cannot be undone. Approve?{{ args.* }} is whatever the agent is passing into the tool. {{ toolName }} is the tool’s name.
Memory
Section titled “Memory”By default the agent remembers what’s in the current conversation. To remember the user across sessions, turn on the Memory Bank.
-
Build a Chat-Ended Workflow that summarizes the conversation. It runs automatically when a session ends. Set it under Form Settings → Workflows → Chat-Ended Workflow.
-
Have it return a
summaryfield incore.return:summary: "User Steve asked about pricing for the Pro tier. Mentioned they're moving from competitor X. Wants follow-up next week."Hand-write it, or use an
ai.llm-callstep to generate it from the transcript. -
Enable Memory Bank (Form Settings → Workflows → Memory Bank).
-
Reference past summaries in your system prompt:
{% if initial.pastSummaries.length > 0 %}Previous conversations with this user:{% for s in initial.pastSummaries %}- {{ s.summary }}{% endfor %}{% endif %}
The chat-ended workflow gets the full transcript, session metadata, pre-chat fields, and a tool-call summary as initial data — build whatever you want with it. Common moves: log the transcript to a CRM, send an email summary, score sentiment, generate the memory-bank summary.
Pre-chat Form
Section titled “Pre-chat Form”Want to ask for a name or account ID before the chat opens? Drag fields onto the form canvas in chat mode. They render as a pre-chat form; the user fills it out, then the chat opens.
The values are available in templates as {{ initial.* }}:
You're helping {{ initial.name }} from {{ initial.company }}.No fields dragged in? The chat opens immediately. No gate.
Authentication
Section titled “Authentication”Out of the box, chat agents are public. To restrict access, set up a form-auth credential under Form Settings → Access Control — password, magic link, or one-time code by email. The chat won’t open until the user signs in.
Signed-in users get chat history that follows them across devices. Anonymous users get history per browser (cookie-based).
Things to Try
Section titled “Things to Try”- Customer support agent that looks up accounts, summarizes recent tickets, creates new tickets (with approval).
- Booking assistant that checks calendar availability, suggests slots, creates events with approval.
- Internal data lookup — sales team asks “what’s the status of the Acme deal” and the agent queries CRM + Slack and stitches an answer together.
- Trip planner that searches flights, suggests itineraries, and saves favorites to a data store.
Pick the smallest version, build one tool first, ship it, add tools later.
Limits and Cost
Section titled “Limits and Cost”The agent step has three limits under Limits (optional):
- Max Iterations (default 10) — max LLM calls per chat turn. Each call can request multiple tool calls in parallel — this caps the LLM round-trip count, not the tool-call count. More iterations = more chained reasoning = more tokens.
- Max Total Tokens (default 32000) — token budget per turn. The agent stops when it hits this. Your real cost ceiling.
- Timeout (default 120s) — wall-clock cap. If the agent is still going after this, it’s killed.
Defaults are fine for most chats. Tune down for cost or speed; tune up for complex multi-tool workflows that legitimately need more rounds.
Related
Section titled “Related”- Chat Triggers — the form-trigger configuration details (what changes in the builder when you flip Mode to Chat)
- AI Steps —
ai.agentconfiguration in depth - Sub-Workflow — how tool sub-workflows are wired
- Knowledge Bases — attach KBs the agent can search
- Connections — credential setup for tool sub-workflows that hit external APIs